Mastering the Art of Installing Continuous External Insulation
As energy efficiency becomes an ever more important consideration in building construction and renovation, continuous external insulation has gained significant popularity. This technique not only enhances a building's thermal performance but also offers various other benefits like moisture management, acoustic insulation, and a fresh exterior appearance. However, installing continuous external insulation requires careful planning and execution. While you can and should reach out to our team for personalized strategic help, here are some basic tips for contractors to successfully navigate the process.
1. Pre-Installation Preparation:
a. Conduct a Site Assessment: Thoroughly examine the building's existing structure, including wall materials, exterior finishes, and potential points of heat loss or moisture infiltration. This assessment will help you determine the insulation material and system that best suits the building's needs.
b. Choose the Right Insulation Material: Depending on the climate, building type, and budget, select an appropriate insulation material. Common options include expanded polystyrene (EPS), extruded polystyrene (XPS), mineral wool, and polyurethane foam. We at Thermal suggest that Neopor graphite polystyrene (GPS) is the best overall performing foam, but we encourage you to do your own research. Thermal conductivity, fire resistance, and moisture management properties are factors to consider.
c. Design the Insulation System: Collaborate with an architect or engineer to design a suitable insulation system. This includes determining the insulation thickness, attachment method, and potential for thermal bridging.
- Installation Steps:
b. Attach the Insulation: Use the chosen attachment method, such as mechanical fixings, adhesive, or a combination of both, to secure the insulation panels to the exterior wall. Follow the manufacturer's guidelines for spacing, fastening, and overlap.
c. Address Thermal Bridging: Incorporate measures to reduce thermal bridging, which occurs when there is a break in the insulation layer, allowing heat to escape. Use insulated fixings and consider adding additional insulation at potential weak points.
d. Create a Continuous Insulation Layer: Ensure that the insulation panels are properly aligned and form a continuous layer without any gaps or voids. This is crucial to achieve the desired thermal performance.
- Finishing Touches:
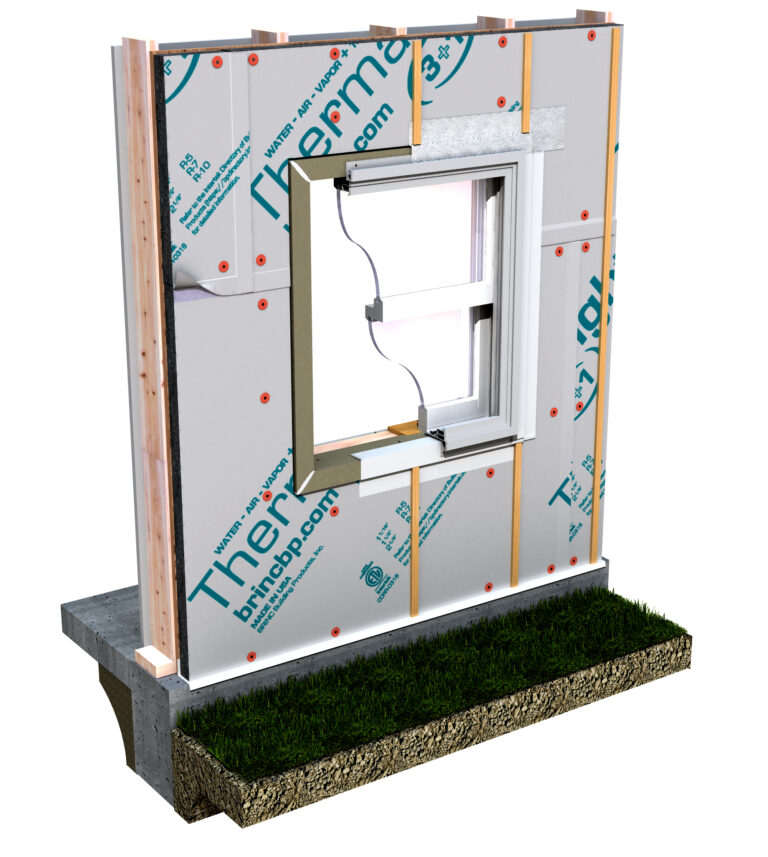
a. Apply a Weather-Resistant Barrier: Install a weather-resistant barrier over the insulation to protect it from moisture, wind, and UV exposure. This barrier also contributes to the building's overall weatherproofing. Just so you know, here at Thermal, we integrate the WRB directly into our products, saving you this entire step.
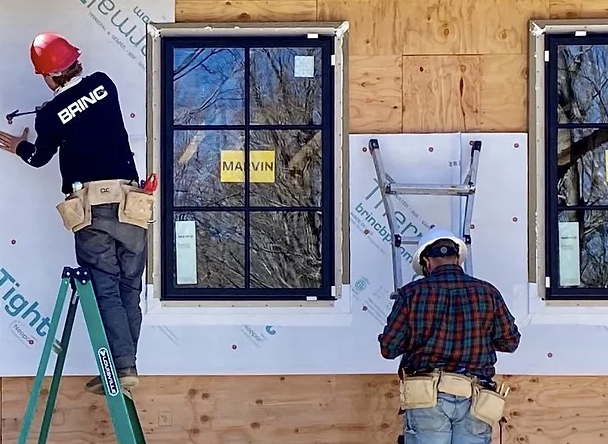
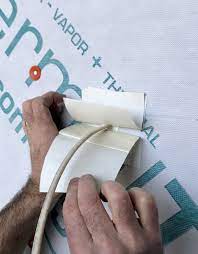
b. Install Finishing Materials: Depending on the building's design and aesthetic requirements, apply finishing materials such as render, cladding, or siding. These materials not only enhance the building's appearance but also provide additional protection to the insulation layer.c. Seal Joints and Penetrations: Pay careful attention to joints, corners, and any openings for windows, doors, or utilities. Properly seal these areas to prevent air infiltration and moisture ingress.
Continuous external insulation is a game-changer for improving a building's energy efficiency and overall performance. By following these guidelines and collaborating closely with architects, engineers, and material suppliers, contractors can ensure a successful and efficient installation process. Remember, attention to detail and commitment to best practices will ultimately result in a well-insulated, comfortable, and sustainable building that stands the test of time.